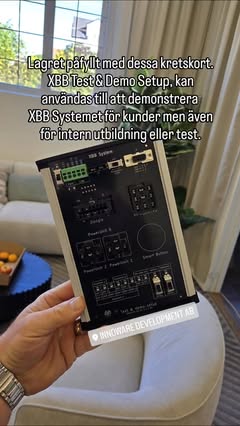
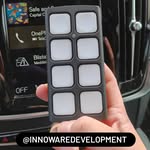
The XBB system has three main parts
XBB Dongle® reads signals digitally from the systems of the car
through the diagnostic socket (OBD2).
XBB PowerUnit® controls auxiliary lights and accessories following the
Bluetooth instructions from XBB Dongle®.
XBB Configurator (app) is used for installation, settings and testing.
Step 1 - Preparations
A tip: read the whole manual through before you start the installation.
- Make sure the car is compatible, through the XBB website.
- Download XBB Configurator from the App Store or Google Play.
- Create an account.
Step 2 - Install XBB Dongle®
- Locate the OBD2 socket of the car (most often in the driver footwell).
- Connect XBB Dongle® firmly into the socket.
- Start the car.
The Dongle has to sit steady for the signals to be read correctly.
Step 3 - Connect the Dongle in the XBB Configurator app
- Open XBB Configurator.
- Search for an available XBB unit.
- Connect to the Dongle.
- Update the firmware if the app recommends it.
The connection drops after an update. The Dongle should reconnect itself after a little while. If
it does not, you need to unplug the Dongle, put it back into the OBD2 socket and search for the XBB
unit again.
Step 4 - Choose and test a recipe
A recipe is a ready made software configuration that reads which signals the car sends.
- Remove any preinstalled standard recipe.
- Choose a recipe that matches the car:
- Make
- Model year
- Type of lighting
- Check in the app that the basic signals are shown correctly, for example:
- IGNITION
- SYSTEM_ACTIVE
- HIGHBEAM
If the signals are wrong, or you cannot find a recipe that fits your car exactly, choose another or
a similar recipe and test the signals.
Step 5 - Check that the system sleeps
- Switch off, step out of the car and lock it.
- Check in the app that the system goes to sleep, which it does when every signal turns red.
This matters, so that the battery is not drained while the car is parked.
Do not stay in the car during this particular test. Check that the signal
SYSTEM_ACTIVE or IGNITION counts down to zero and turns red. Which one is used depends on the
recipe. If the signal does not turn red, the recipe does not match the car and the battery risks
being drained.
Step 6 - Fit the auxiliary lights and the wiring
- Fit the auxiliary lights on the vehicle according to the instructions of the manufacturer.
- Run the wiring to the place where the PowerUnit® is to be mounted.
- Connect:
- Positive (through a fuse close to the battery)
- Ground
- Output 1 and / or 2 of the PowerUnit® to the lighting
Always check the ground connection carefully.
Fuse and wire gauge. Always use a fuse and place it as close to the battery as
possible. Too thin a wire can in the worst case start a cable fire.
Choose the connection according to the current:
- An ordinary cable lug: 15 to 24 amps, depending on the make.
- A standard Power Timer sleeve: up to 40 amps.
Step 7 - Install XBB PowerUnit®
- Connect the power and the outputs.
- Place the PowerUnit® sheltered from heat, moisture and mechanical stress.
- Mount the PowerUnit® with the pins and connectors facing down.
Output 1 handles up to 15 A and output 2 up to 5 A.
If the lighting draws more than 15 amps, which is 180 W, it must not be wired
straight to XBB PowerUnit®. Connect it through a power relay instead and let the
PowerUnit control the relay coil.
Did you buy a ready made relay harness? Check that every wire in the relay
socket sits right in relation to XBB PowerUnit® before you connect it. Many harnesses
are wired wrongly from the factory, most often with ground and negative in the wrong place.
Step 8 - Add XBB PowerUnit® in the app
- Start the car.
- If the PowerUnit® was not added automatically, tap Add XBB unit. If the unit was added
automatically, go to step 5 below.
- Tap Add PowerUnit®.
- Choose your XBB PowerUnit®.
- Test every output with the test function, either from the settings or on the start page.
- Assign which signals are to control which output.
If you want the high beam to switch the lighting on, choose the signal HIGHBEAM on the output where
the lighting is connected. If the lighting has a built in position light that you want to use,
IGNITION is usually preferable, unless the signal POSITIONLIGHT is available for your car. Save the
choice.
Position lights can be illegal to use, depending on when they are active and in
combination with which other lighting. This concerns lighting with a built in position light.
Step 9 - Final function check
- Switch on the high beam and the other functions.
- Check that the lighting reacts correctly.
- Switch off and lock the car. Verify that the system shuts down.
Finished installation
The XBB system is now installed and ready to use. If adjustments are needed, the settings can be
changed straight in the app without redoing the installation.