Step 2. Download & install the app.
-
- To install the XBB system, you need the XBB Configurator app, which you can find on Google Play or App Store.
- Start the app and create an account.
- Then verify the account with the code sent to your email. (If you don't receive an email, check your spam folder).
Step 3. Mount the XBB Dongle®.
-
- The XBB Dongle® is installed in the car's diagnostic port, also known as the OBD2 connector. The port is usually located in the driver’s footwell. Sometimes it may be hidden behind a panel that needs to be opened or removed to install the XBB Dongle®.
-
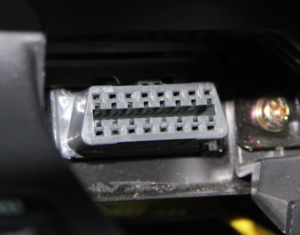
Example of an OBD2 connector.
- Make sure to firmly press your XBB Dongle® into the socket.
- If you are using a Y-splitter or extension cable, ensure that the XBB Dongle® is securely installed and not hanging from the wiring. This is important for the built-in accelerometer to function correctly and detect the car's movements.
- The XBB Dongle® must be installed in the diagnostic port for the auxiliary light installation to work.
Step 4. Installation of the XBB Dongle®.
-
- Start the app and click on "Search for XBB Device."
- Select the XBB Dongle® that appears to continue the installation.
- Follow the instructions for firmware update if recommended.
- If you are unable to reconnect to your XBB Dongle® after the update, try removing it from the car's OBD2 port and reinserting it.
- Note! The XBB Dongle® is only visible to the phone for 10 minutes after it has been powered on. If you need to reconnect, you must unplug it from the diagnostic port and plug it back in. To avoid doing this, you can pair your phone via the app: Connect to your XBB Dongle® → Tap Settings (the gear icon), then select Pair with XBB Dongle®.
Step 5. Choose a recipe.
-
- A recipe is a unique software developed for a specific car model and its equipment package, which can include model year, headlight model, facelift, transmission, software, and similar factors.
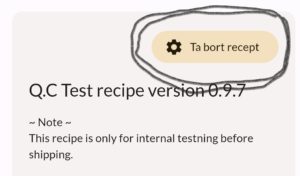
- If your XBB Dongle® is brand new, it will come pre-installed with a Q.C. recipe (Quality Control). This recipe is intended only for our internal quality tests conducted during production
- Start by clicking on settings and then 'Delete recipe.'
- Then click on 'Change recipe.' You can change the recipe an unlimited number of times.
- Select a recipe based on your car model. There are usually several to choose from, so start with the one that best matches your car, such as model year, headlights, and other relevant specifications.
Step 6. Test the recipe.
-
- Starta bilen och kontrollera att signalen IGNITION alt. ENGINE_RUNNING aktiveras i appen. Kontrollera sedan med hjälp av appen att de signaler du är intresserad av fungerar genom att aktivera motsvarande funktion i bilen. Till exempel, när du aktiverar helljuset ska signalen ”HIGHBEAM” ändra status till ”PÅ” och markeras med grönt. Samma sak gäller för övriga signaler.
.
Start the car and check that the IGNITION or ENGINE_RUNNING signal is activated in the app. Then use the app to verify that the signals you are interested in are working by activating the corresponding function in the car. For example, when you turn on the high beam, the “HIGHBEAM” signal should change its status to “ON” and be highlighted in green. The same applies to the other signals. - If you need to try another recipe, click on 'Settings' and select 'Delete recipe.' Then choose 'Change recipe,' find a new recipe, and test the functions again.
- Note Important! Complete the installation of the XBB Dongle® by turning off the car and locking/arming it. Then check in the app that the 'SYSTEM_ACTIVE' signal is displayed. If the signal is present, it is important to ensure that, after locking/arming the car, it counts down to 0 and turns red.
- Note! Do not remain seated in the car while performing this test. If the signal does NOT turn red, the recipe does not match your car, and there is a risk that the car’s battery may be drained. In that case, try a different recipe.
- Try recipes from other car models that are built on the same platform and use the same type of lighting. (Bi-xenon, LED, LED-matrix, etc.)
- Note! There may not be a recipe compatible with your specific car! If you haven’t found a working recipe after trying different models for about 10 minutes, we recommend switching to an alternative installation method.
- If you have the possibility to visit us in Sala with your car, we can try to create a new recipe for you. You can book a recipe reading here on the website — see the main menu under “Compatible car models.”
- Starta bilen och kontrollera att signalen IGNITION alt. ENGINE_RUNNING aktiveras i appen. Kontrollera sedan med hjälp av appen att de signaler du är intresserad av fungerar genom att aktivera motsvarande funktion i bilen. Till exempel, när du aktiverar helljuset ska signalen ”HIGHBEAM” ändra status till ”PÅ” och markeras med grönt. Samma sak gäller för övriga signaler.
Step 7. Install your lighting on the vehicle.
- Have you found a working recipe for your car? If not, go back to Step 1 and try again.
- Mount your lighting and route the wiring to the location where you plan to install your XBB PowerUnit®.
- Note! Have you purchased a pre-made relay harness?
In that case, it is especially important to check that all wires in the relay socket are correctly connected in relation to your XBB PowerUnit®. Unfortunately, many China made harnesses are miswired and need to be corrected before connecting the XBB PowerUnit®. The most common issue is that the ground connection/negative is placed incorrectly. - Remember to place your XBB PowerUnit® in an upright position and as protected as possible from heat and moisture.
- Note! If your lighting draws more than 15 Amps (180W), it cannot be connected directly to your XBB PowerUnit®. In that case, you will need to connect the lighting to a power relay, which is controlled by your XBB PowerUnit®.
- Wiring diagrams with different connections are available on our website. Link
- ALWAYS use a fuse and place it as close to the power source or battery as possible.
- Make sure to use the correct wire gauge to avoid using cables that are too undersized. Cables that are too thin can, in the worst case, result in a cable fire.
- Keep in mind that a standard cable terminal is designed to handle between 15 and 24 Amps, depending on the brand and wire gauge.
- We recommend using Standard Power Timer terminals in relay sockets and fuse holders.
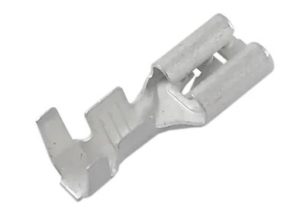
Uninsulated cable terminal (Up to 24A)
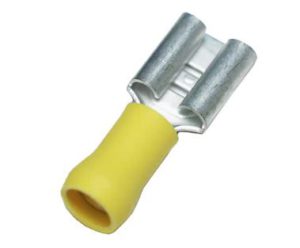
Insulated cable terminal (Up to 24A)
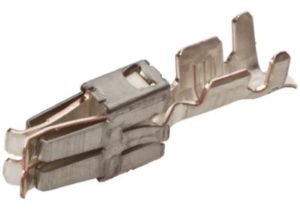
Standard Power Timer (Up to 40A)
Step 8. Installation of the XBB PowerUnit®.
- You can install and connect up to 4 XBB PowerUnits® to one XBB Dongle®, or 3 XBB PowerUnits® and 1 XBB Smart Button.
- The XBB PowerUnit® can handle a maximum of 15 Amps (180W). If the lighting draws more than this, you must connect it via a power relay. Then let your XBB PowerUnit® control the relay coil.
- Note! Have you purchased a pre-made relay harness?
In that case, it is especially important to check that all wires in the relay socket are correctly connected in relation to your XBB PowerUnit®. Unfortunately, many China made harnesses are miswired and need to be corrected before connecting the XBB PowerUnit®. The most common issue is that the ground connection/negative is placed incorrectly. - The XBB PowerUnit® should be mounted upright with the connectors facing downward and protected as much as possible from heat and moisture.
- Preferably mount the XBB PowerUnit® near the firewall to minimize the distance to the XBB Dongle®.
Step 9. Add the XBB PowerUnit® in the app.
- For your lighting to work, your installed XBB PowerUnit® must be added to the app, and you also need to decide which functions you want it to perform.
- Open the XBB Configurator® app to begin the setup.
- If you haven’t paired your phone with your XBB Dongle® (Step 4:5), and more than 10 minutes have passed since you were last connected, you will need to remove it from the diagnostic port and reinsert it for the phone and app to connect.
- Go to the 'XBB PowerUnit®' tab, click on the plus sign, and select 'Add XBB PowerUnit®'.
- Select the XBB PowerUnit® that appears and then click on 'Settings' (the gear icon).
– If no device appears despite several attempts, it is likely that your XBB PowerUnit® is miswired. Check the wiring, fuse, and connections. - Nästa moment att trycka på knappen ”Hold to test output”, på så sätt kan du testa om din belysning är korrekt inkopplad. Om allt är rätt kopplat, ska belysningen tändas när du håller in den knappen oavsett övriga val och inställningar i appen.
.
The next step is to press the “Hold to test output” button, which allows you to verify that your lighting is wired correctly. If everything is connected properly, the lighting should turn on when you hold the button, regardless of any other selections or settings in the app. - If the lights turned on during the test in the previous step, you should now specify which signal should activate each output on your XBB PowerUnit®.
- Output 1 (Out 1) can handle a MAX of 15 Amps (180W).
- Output 2 (Out 2) can handle a MAX of 5 Amps (60W).
- If you want the high beam to activate your lighting, select the 'HIGHBEAM' signal on the output where you have connected the lighting. Click 'Save' when you have made your selection.
- If you have purchased lighting with a built-in position light and want to use it, the 'IGNITION' signal is usually preferred, unless the 'POSITIONLIGHT' signal is available. Click 'Save' when you have made your selection.
- Note! Be aware that the position light in your connected lighting may be illegal to use, depending on when and in combination with other lighting on the car it is active.
Step 10. Function check and completion.
- Some car models and recipes require us to use the built-in accelerometer in the XBB Dongle® to determine if the car is started. This means that your XBB Dongle® is in sleep mode until it detects vibrations or movements in the car. Start or drive the car when testing the functions for the best results. You can also gently tap the dongle to wake it up.
- Keep in mind that some functions, such as automatic high beams, may not work if it's not dark enough outside.
- Perform a function test of the entire installation.
- Note Important! Note Important! Don't forget to check the 'SYSTEM_ACTIVE' signal in the app. See Step 6:3.