XBB Dongle® & XBB PowerUnit®
The most common question we receive, which is why it’s at the top.
Read the following 3 questions below; they should answer your query.
If you're still unsure, take advantage of the distance selling law and order a kit to try in your car. As long as you don't damage the packaging or the product in any way, returning it within 14 days shouldn't be a problem.
To test the functionality in your car, you need to create an account in the XBB Configurator app and connect the XBB Dongle to the diagnostic port. Follow the installation guide to ensure you don’t miss anything!
Another option is to contact your local car workshop. If you're lucky, they use the XBB Dongle, and you may be able to visit them to test it in your car.
If your car model is not on the list, YOU must test with an XBB Dongle® and the XBB Configurator app to see if the signals are displayed correct in the app.
It might be the case that a specific recipe works for several car models that are not included in the list, if your car is built on the same model platform and has the same type of headlights as in another recipe.
However, this is not guaranteed, and it is only after testing with an XBB Dongle® that you can confirm whether it works.
To find out which other car models share the same platform, check the English version of Wikipedia. Search for your car model and look up the platform it is built on.
Here are examples of two common platforms used by the VW Group: MQB & MLB.
We continuously create and upload new recipes, prioritizing popular cars first, but also adding any cars we get access to as time allows. For car models older than 2010, the XBB System generally does not work.
If you have the possibility to visit us in Sala to create a recipe for your car, you can book an appointment via the main menu under “Compatible cars.”
It is possible to create recipes for most car models newer than 2010. However, we need physical access to that specific car model with your exact type of equipment, such as headlight type, transmission, facelift, etc. Once we have your car or a corresponding model with us, it takes about 2 hours to extract the information we need to create a new recipe.
If you have the possibility to visit us in Sala to create a recipe for your car, you can book an appointment via the main menu under “Compatible Car Models.”
This may happen if the selected recipe is not compatible with your car. Therefore, it is important that your read and understand the last step in our installation manual., read below
Important! Finish the installation by switching of and lock your car. Then check in the app if the signal SYSTEM_ACTIVE listed. If so it's important that SYSTEM_ACTIVE gets highlighted with red color (0/AV/OFF) 2 minutes after exiting and locking your car. If that doesn't happen the selected recipe isn't compatible with your car and there's a risk of draining the battery. Please try a different recipe.
It may also be the case that the battery is drained if your car is equipped with a current sensor (BMS sensor) on the battery and you have connected directly to the battery terminals. In that case, the car does not detect that you have installed more power consumers and therefore cannot charge the battery correctly, causing the battery to discharge over time. This has nothing to do with XBB products, but rather with connecting additional power consumers to the car, such as lighting, car stereo, amplifiers, etc. To fix this, the connection points must be after the BMS sensor, with the positive cable ideally connected at the car's fuses and the negative cable at a good grounding point on the car's chassis.
Reason 1
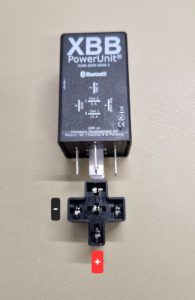
Check the wiring to XBB PowerUnit®. On some relay harnesses on the market, the negative (-) connection is in the wrong place in relation to your XBB PowerUnit®. Double check that the negative cable goes to pin 6 (GND) on the XBB PowerUnit®.
When holding the XBB PowerUnit® in your hand with the text/logo facing you, the left pin should be GND. Follow this cable from the relay kit and double-check that it is grounded. Some relay sockets can easily be re-pinned with a pin removal tool to ensure that GND is in the correct place. It should be noted that we do not manufacture or sell any relay kits, so if it is wired incorrectly, please take it up with your reseller.
 Video showing how to fix the problem.
Another option is that you simply haven't read the Installation guide and forgot to add a XBB PowerUnit in the app.
Video showing how to fix the problem.
Another option is that you simply haven't read the Installation guide and forgot to add a XBB PowerUnit in the app.
Video showing how to fix the problem.
Reason 2.
If XBB PowerUnit® has previously worked, but is no longer in the app, it is usually due to one of the following.
- The user has updated the firmware/software in the XBB Dongle®, in connection with this, the XBB PowerUnit® and the selected recipe are removed from the system and must be added again in the app.
- If XBB PowerUnit® is not found in the app despite following point 1, you may have to update the software manually in XBB PowerUnit® (described in the FAQ)
- If it still does not work, the PowerUnit has probably not been mounted in an upright position and thus become water damaged over time and must be replaced. Another option is that you simply did not read the Installation Guide and missed adding an XBB PowerUnit® to the app.
If your LED bar or auxiliary lights turns off after approximately 10 seconds, even though the high beams are active, it is because you have connected lighting that draws more power than what the XBB PowerUnit is designed for.
If you have the app running, it will also indicate under the settings for the XBB PowerUnit that the output(s) are blocked due to overload when the outputs are activated while the phone is connected to the XBB Dongle.
The XBB PowerUnit specifies 15 Amps for Output 1 (Pin 8) and 5 Amps for Output 2 (Pin 5). This information is also stated on the packaging as well as multiple times in the manual. The manual also explains how to avoid overloading. We also provide a wiring example that shows how you can connect it depending on your needs.
The current (Amps, A) depends on the power (Watts, W) drawn by your lighting and the voltage (V) of your car. In other words, the current can vary for the same light depending on the car battery's voltage and whether the car's alternator is charging. Cold temperatures can also cause the light to draw more power than specified.
So, how do you know how much current is being drawn?
By using Ohm's Law, which states the following: Power / Voltage = Current (Amps).
For example: If your new LED bar draws 250 W according to the manufacturer and your car battery is at 12.7 V, your LED light bar will draw approximately 19.7 A.
19.7 A is, as you might know, more than 15 A, which means you will overload the output on your XBB PowerUnit if you connect it directly to one output. In this case, you will need to connect your lighting to a power relay, which is then activated by your XBB PowerUnit.
If you have been connected to the XBB Dongle ® with the phone before but more than 10 minutes have passed since you closed the app, the XBB Dongle ® stops being visible to the phone. In order to then be able to connect to the XBB Dongle ® again , you must pull it out of the OBD2 port and put it back in again. If you want it to always be visible to the phone, you must click on the main menu in the top left corner and then select Pair with the phone.
Du have to have Location settings enabled in your phone. If it still does not work, try removing the XBB Dongle® from the diagnostic socket and reconnecting it.
This is because you have overloaded the output(s) of your XBB PowerUnit. To prevent it from breaking, it will automatically turn off the outputs after about 10 seconds.</br></br>
Output 1 can handle 15 Amps, i.e. about 180 W. However, some online stores lack the knowledge to calculate the power/current, which leads them to sell XBB PowerUnit together with ready-made lighting packages that will never work if you do not use an extra power relay. How to connect with an extra relay, you can see in our XBB PowerUnit® wiring guide but also in this video clip..</br></br>
Tip: contact the company you bought the light kit from and point this out to them and they might take action.
På nyare Mercedesmodeller som bygger på MRA2 plattformen fungerar det inte att montera XBB Dongle® i diagnusuttaget. Detta pga av att Mercedes inte längre använder CAN-bus som kommunikationsgränssitt via diagnusuttaget. På dessa modeller behöver man istället koppla in sig på bilens interna CAN-bus nätverk. Detta kan göras med en en vanlig XBB Dongle® tillsammans med vårt Adapterkablage alternativt med vår produkt PP-CAN-FD.
Dock finns det några villkor..
- Din XBB Dongle® måste stödja CAN-FD vilket den gör från och med hårdvaruversion 2*.
- Du behöver ett Adapterkablage.
- Du behöver vara tekniskt kunnig inom fordonselektronik och har rätt verktyg för jobbet.
- Recepten som finns tillgängliga för MRA2 plattformen hittas under Kompatibla bilmodeller – PP-CAN – Mercedes
In a few car models, there may be a slight delay in both activation and deactivation. This delay is usually between 30–80 ms and is due to a combination of factors: the XBB PowerUnit does not activate the outputs until the car’s high beams are fully activated/deactivated, and the data signals from the car – XBB Dongle – XBB PowerUnit take about 10–30 ms.
Additionally, some LED lights have a "built-in" delay of about 100–150 ms from the moment the light bar/LED light receives power to when it actually lights up, regardless of how the light is connected.
There is nothing wrong with your XBB Dongle; it has simply gone into standby mode to prevent the car's battery from being affected when the car is turned off. Inside the XBB Dongle is an accelerometer that detects movements such as vibrations and shaking. This small component is necessary, depending on the car model/recipe, to determine if the car is started and in motion. When it detects movement, it wakes up and starts listening/communicating with the car to retrieve the necessary information for proper functionality.
However, sometimes movements like closing the car door or starting the engine may be too weak for the accelerometer/software to detect, and the XBB Dongle may not wake up from standby mode, which can give the impression that it’s not working.
This is usually resolved by simply driving the car, as the resulting movements and vibrations will wake it up automatically. You can also try tapping lightly on the XBB Dongle with your hand to see if it wakes up and functions as expected.
For certain car models, this feature is required by the recipe, while for others, the data from the accelerometer isn’t necessary because the XBB Dongle receives information via the CAN bus about whether the car is started.
Gyroscope, gyro, memory loss, won't start, unplug.
There is nothing wrong with your XBB Dongle; it has simply gone into standby mode to prevent the car's battery from being affected when the car is turned off. Inside the XBB Dongle is an accelerometer that detects movements such as vibrations and shaking.
This small component is necessary, depending on the car model/recipe, to determine if the car is started and in motion. When it detects movement, it wakes up and starts listening/communicating with the car to retrieve the necessary information for proper functionality.
However, sometimes movements like closing the car door or starting the engine may be too weak for the accelerometer/software to detect, and the XBB Dongle may not wake up from standby mode, which can give the impression that it’s not working. This is usually resolved by simply driving the car, as the resulting movements and vibrations will wake it up automatically. You can also try tapping lightly on the XBB Dongle with your hand to see if it wakes up and functions as expected.
For certain car models, this feature is required by the recipe, while for others, the data from the accelerometer isn’t necessary because the XBB Dongle receives information via the CAN bus about whether the car is started.
Gyroscope, gyro, memory loss, won't start, unplug.
Yes, it is possible to take advantage of the XBB Dongle® & XBB PowerUnit®, but you need to use an extra relay to handle the higher current. Wiring guide is found on our website www.xbb.se, then click XBB Dongle to proceed. There is also a video clip that shows how to do it.
Many believe that the delay, which sometimes occurs between activating the high beam lever or automatic high beam activation and when your lights or LED bar start to illuminate, is caused by the Bluetooth communication between the XBB Dongle and the XBB PowerUnit.
It's not that simple; the main culprit in this scenario is primarily your car's headlights and, in some cases, your LED bar or LED lights.
Below is a more detailed explanation for those interested.
Let’s go through it again! We’ll start with Volvo. Drive the car up to a wall and turn on your high beams (not the flash-to-pass, but with the lever pushed forward) without the auxiliary lights connected.
The car's high beams will activate immediately, and after approximately 100ms, the brightness will increase further.
Volvo refers to this as "enhanced high beams," designed to help the eyes adjust to the higher light output. XBB receives the high beam signal once this enhanced high beam is fully activated.
This is the reason for the delay, specifically with Volvo and their Full LED Active High Beam System on the SPA platform.
From the moment the Dongle receives the high beam signal, it takes a maximum of 7.5 milliseconds for the PowerUnit to receive the signal via BLE.
The CAN data in the dongle is read every 10 milliseconds, so the theoretical maximum time to read the signal and activate the output wirelessly is 17.5 milliseconds.
Most car models respond to a CAN message with the high beam value within 20-30 milliseconds. Adding this to the calculation, the total maximum delay is 47.5 milliseconds.
However, note that all of this is interwoven between different systems and clocks, so a more realistic delay is around half of this—approximately 25 milliseconds.
Specifically for Volvo, both the left and right headlights are read, which adds additional time. This is done to check if either of the lights has dimmed when the adaptive lighting is activated, ensuring that the light bar can be turned off accordingly.
In most recipes, we detect the activation of the high beams from the central module, which the car's headlights also read from. In certain configurations, such as with VAG cars, the light bar may sometimes turn on before the original high beams, as the signal in question is sent out and picked up by the dongle before the car's headlights activate.
The issue with delays is most noticeable when using light bars or auxiliary lights with built-in delays designed to protect the electronics in the lighting. For example, Lazer has included this feature in some of their light bars.
To clarify, the delay is **NOT** caused by the BLE communication between the dongle and the PowerUnit.
I tidigare recept så hade vi en timeout på 100ms om en specifik signal inte fanns, exempelvis på en manuellt växlad bil så läste vi ut växelinformation från automatlådan, när denna inte svarade så väntade donglen 100ms innan den gick vidare och läste ute helljus signalen igen, detta gav upphov till en fördröjning som de allra flesta var ”nöjda” med, men i själva verket från min sida var ett felaktigt recept.
Vi har succesivt byggt om de flesta recept så att, denna fördröjning är längre 500ms så att det ska upplevas som ”förjävligt” och antingen hitta ett annat recept för sin aktuella bilmodell, eller kontakta oss för att antingen uppdatera receptet så att signalerna läses ut parallellt (=ingen fördröjning). Eller skapa ett nytt recept utan ”onödiga” signaler.
Generally, there should be no noticeable delay with the XBB system. If there is a slight delay (<100ms), it is due to the reading technique and the car's response time.
In later Volvo recipes, we have also included the reading of the high beam lever and combined those signals with the HIGHBEAM signal to reduce delay. However, in the specific case of Volvo, there is unfortunately still a delay due to the enhanced high beam system. For instance, in our V60 test platform, which we used for many years, I could observe 2-3 CAN messages where the high beam indicated "off," even though the high beam was actually activated.
During normal driving, We didn't find the delay particularly bothersome; it was more noticeable when flashing the high beams at someone or when standing in front of a wall and blinking the auxiliary lights, similar to what you see in the video.
This is not a fault with the XBB Dongle but a known issue with certain Pixel phones. The product works as intended on other Android phones and on iPhone. Several users have reported the same problem in Google’s own forum:
[https://support.google.com/pixelphone/thread/352778648/wrong-passkey-or-pin-message-while-pairing-a-blueooth-devce?hl=en&fbclid=PAT01DUANHr9ZleHRuA2FlbQIxMAABp_32EnLHVgwg6u-bOWMfrx2jciydEq5m0IFaqifBk_55ZFo_9-bDzTRXiGdL_aem_JHJCV3Ljx09CfCPWUe1a0Q](https://support.google.com/pixelphone/thread/352778648/wrong-passkey-or-pin-message-while-pairing-a-blueooth-devce?hl=en&fbclid=PAT01DUANHr9ZleHRuA2FlbQIxMAABp_32EnLHVgwg6u-bOWMfrx2jciydEq5m0IFaqifBk_55ZFo_9-bDzTRXiGdL_aem_JHJCV3Ljx09CfCPWUe1a0Q)
Pixel, Android, Google
Most car manufacturers are constantly working to improve the software in their vehicles. Some car models are updated automatically over the internet, but it’s also common for your authorized service center to update your car’s software during a service visit, sometimes without your knowledge. In rare cases, such updates may cause our XBB Dongle to no longer function as expected.
This could happen, for example, if Volvo changes something in their software, making the data information no longer align with what our XBB Dongle expects. In the best-case scenario, this issue can be resolved by updating your recipe to the latest version via the app. However, if the problem persists, you need to contact our support team so that we become aware of the issue and can work on a solution. Please use our support form on the website to report this.
To update the firmware in the XBB Dongle, click on the Main Menu (the three lines in the top left corner) and select "Update Firmware." The app will then retrieve the current program version and suggest an upgrade if one is available.
XBB PowerUnit
To update the firmware in the PowerUnit, you first need to unplug the XBB Dongle from the diagnostic port. After removing the XBB Dongle, click on the Main Menu (the three lines in the top left corner) and select "Update Firmware." Then, select the PowerUnit you want to update. The app will retrieve the current program version and suggest an upgrade if one is available.
When you update the firmware version in the XBB Dongle, you must select the recipe again and add the XBB PowerUnit as all settings are reset to zero during the update.
Yes, it works. However, the recipe in question must have been developed for adaptive high beam, this is stated in the recipe description if/how this is available.
However, if you have very powerful auxiliary lights or a powerful LED bar, the road signs may reflect back so much light that the car wants to turn off the high beam or redirect it, and then the XBB PowerUnit® output will also be turned off.
It's worth considering that the risk of dazzling other road users increases when you install more lighting on your car than what the automation is adapted for, i.e. your auxiliary lights/LED bar shine much further than what the car's camera system can see.
The most common cause is that the car’s battery was disconnected during the installation, which can generate various error messages in the car. These error messages usually disappear after driving the car a few kilometers.
Another possible cause is that the XBB PowerUnit/lighting was connected directly to the negative terminal of the car battery. This prevents the car’s BMS (Battery Management System) sensor from detecting the new load, which in turn means the alternator will not charge the battery sufficiently. As a result, the battery voltage gradually drops, potentially causing various error messages.
This issue can be resolved by grounding the lighting, XBB PowerUnit, or any other retrofitted equipment to a proper grounding point on the chassis and NOT directly to the car battery.
You have most likely connected the cables to the XBB PowerUnit incorrectly and confused the cable from the battery and the cable to the lighting. The positive (+) must be connected to pin 2.
The placement of the XBB Dongle installation depends on the car's model year. However, a common factor for all models is that the XBB Dongle cannot be connected to the diagnostic port, as is possible with traditional fossil-fuel cars. This is because the necessary CAN-bus information is not available through that port.
Our experience shows that for Tesla Model Y vehicles manufactured in early 2023 or earlier, the XBB Dongle should be connected between the front seats, underneath the rear seat ventilation unit. To access the connection, a plastic cover needs to be removed. Behind the cover, there is a blue connector that must be disconnected. A splitter cable, which connects between the two blue connectors, is required for installation. This cable can be purchased from some of our resellers or from companies specializing in Tesla accessories. We do not manufacture or sell this cable ourselves.
For model years from the third quarter of 2023 and later, the blue connector is instead located on the side of the center console, just to the right of the driver’s leg. The felt mat must be removed, and behind it, there is a wiring harness. Here too, a splitter cable is required, connecting between the car’s original connectors.
Since Tesla is a fully electric vehicle, it does not need to adhere to the same standards as fossil-fueled cars. This means, among other things, that on certain models, there is a diagnostic port (OBD2) near the driver’s seat, but the data available there is insufficient to control your lighting via the XBB Dongle. In such cases, a special cable must be used to connect the XBB Dongle at a different location in the car. More on this further down in the response.
For some models (S & X) during a certain period (2012–2019), the correct data is available in the diagnostic port. However, Tesla has placed the communication pins (CAN-H & CAN-L) on different pins compared to all other car models. This means you will need a specific XBB Dongle that is customized for these models. It looks like a standard XBB Dongle but is marked with a label on the side and comes in a red/black package, as opposed to the standard XBB Dongle, which comes in a blue/black package.
Yes, it is true that a special cable is needed, but it is not something we sell. The cable is for "creating" a new OBD2 connector as the one sitting by the driver's legroom does not contain the CAN-bus information needed for the XBB Dongle® to function. You can find more information about the type of cable on various Tesla forums . Some retailers also have ready kits complete with XBB Dongle & cable so take a look there.
If you have a Tesla Model S or X, you will need a special Tesla Dongle, which comes in a red package instead of the blue standard version. Note that other Tesla models should use the standard version. This applies to models from 2012–2021.
No, a phone is only needed during installation and if you want to change recipes, settings or update the software.
Yes it must sit there all the time due to that it reads the car status on headlights etc. continuously and controls XBB PowerUnit®
Your XBB Dongle® has been removed from the diagnostic socket by the inspector/mechanic and they forgot to put it back. They use the same socket to read out error codes etc. from the car when they inspect it, so just put the XBB Dongle® back in the socket and it works as it should again after a few seconds.
It's supposed to be like that, it enables the XBB PowerUnit® to detect short circuit on the outputs.
If possible, you can connect directly to the car battery, but in many modern cars, the battery has a current monitoring system. It is important to connect after the current monitoring system and not between the current monitoring system and the battery terminal. If you have a battery with current monitoring and connect directly to the battery terminal, it can result in the battery being drained while driving with auxiliary lights or the LED light bar activated, as the car does not account for the additional lighting.
What is a BMS sensor?
In this video, Kalle explains what it is. Youtube!
Contact your brand workshop, they should be able to find out what type of headlight you have.
You can also try visiting https://www.car.info/ and see what kind of lighting is listed there.
1. There is a wireless push button (XBB Smart Button) that can be added to the system, which can be used to switch on or off the outputs.
Remove the XBB Dongle® from the diagnostic socket, then the XBB PowerUnit is switched off. If you put the XBB Dongle® back in the socket again, everything works as it should after a few seconds, turn off the ignition before disconnecting & plugging in the XBB Dongle®.
There is a wiring (Y-splitter) that you can put in the socket, this way you can have two modules connected at the same time. There is also an extension cable if you only need to move the XBB Dongle® a bit.
Note! We can not guarantee function together with other types of devices that are in the OBD2 socket, but this must be tested, both so that the XBB Dongle works correctly and also the other device.
You have probably disconnected the battery during the installation and on many modern cars that can result in many different error messages. They often disappear after a drivning for a while. If they don't disappear contact a workshop or use some kind off OBD2 device that can delete error codes.
It may also be that you have chosen a recipe that does not suit your car. Try another recipe, it is important that you follow the manual and check the status of the signal SYSTEM_ACTIVE via the app.
Each recipe is unique to its respective car model and can therefore vary! In some recipes, there are only a few signals to choose from, while other recipes may contain significantly more signals. Below are some examples of signals that might be included in a recipe:
– HIGHBEAM: Shows a steady green light (ON) when the XBB Dongle® detects that the car's high beam is active.
– LOWBEAM: Shows a steady green light (ON) when the XBB Dongle® detects that the car's low beam is active.
– REVERSELIGHT: Shows a steady green light (ON) when the XBB Dongle® detects that the car's reverse light is active.
– IGNITION:Shows a steady green light (ON) when the XBB Dongle® detects that the car's ignition is activated.
– SYSTEM_ACTIVE: Steady green = XBB Dongle® is activated (Ignition on or equivalent signal). This signal must turn red (OFF/Sleep mode) approximately 2 minutes after the car is locked and possibly armed. If it switches between OFF/ON, it indicates that it is transitioning into Sleep mode.
– LOW_BATT:Low battery voltage detected: If it shows a steady green light (ON) or alternates between red and green, the outputs on the XBB PowerUnit® will not activate. Charge the battery or start the car to resolve the issue.
– VOLTAGE:Here, you can check the battery voltage by adjusting the slider (display output value). For example, if the value is 127, it means the battery voltage is approximately 12.7 volts.
– SYSTEM_ON: Check SYSTEM_ACTIVE to verify the system's status.
Volvo's diagnostic port differs from other car brands, which makes the XBB Dongle® very difficult to insert—but it does fit. It works well with all other car models. In the spring of 2022, we switched to a different connector that fits Volvo's diagnostic port better, so this issue has been resolved with XBB Dongles produced after May 1, 2022.
Try unplugging the XBB Dongle® from the diagnostic socket and plugging it back in. Also take the opportunity to update the software (Firmware) and the recipe as we are constantly working on improving it and working out bugs in the system.
First, an XBB PowerUnit® must be added. After that, the procedure is almost the same. In the app, under the PowerUnit tab, tap the button and select “Add XBB Button,” then follow the on-screen instructions. Once it has been added, go to its settings and choose what should happen on a single and double press.
Our way of designing recipes is constantly evolving and getting better and better. Try deleting your existing recipe and reinstalling it, you can also check if there is a new variant of recipe for your car.
XBB Dongle® reads the CAN-bus system just like our competitors in the market. However, we have chosen to do it in a way that makes your job much easier while you do not have to make any interventions on the car's wiring and risk incorrect connections, error codes etc.
Link to our installation manual.
Good luck!